SOAP Attachments
The SOAP Request editor provides a tab Attachments to edit, update and delete attachments
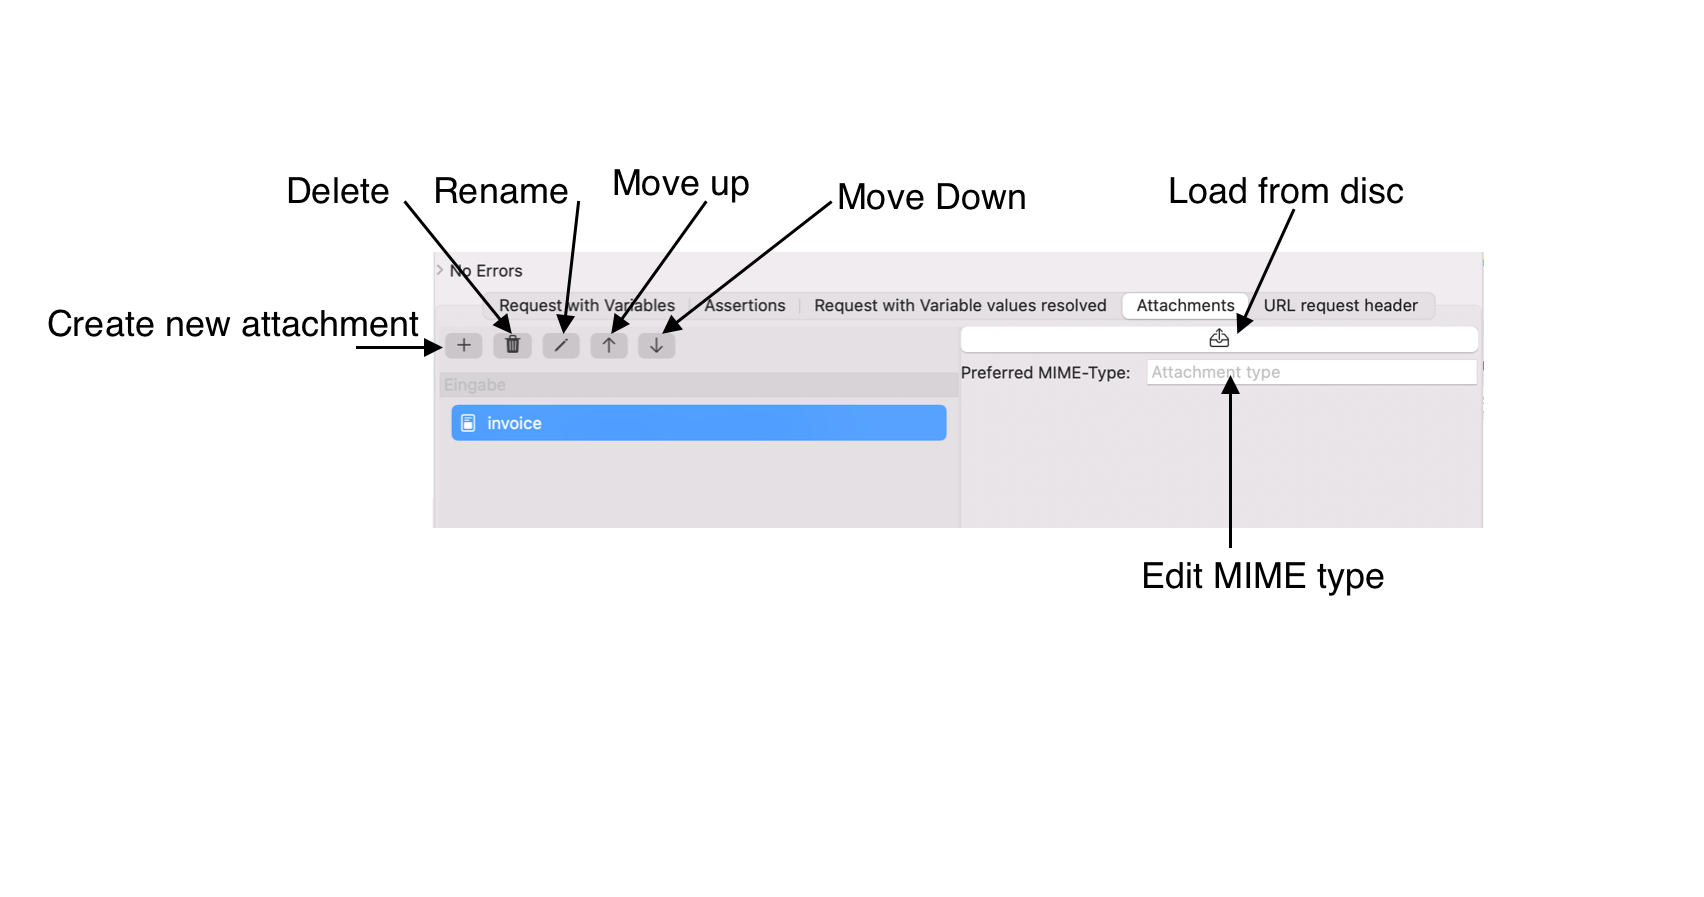
Command overview
- Create new attachment adds a new enty in the attachments list. You need to load the actual content later, as in the screenshot.
- Delete removes the selected attachments from the attachments list. The local file disc content is not removed.
- Rename lets you change the name of the selected attachment. The attachment name is not used in the request and helps you organize your attachment list.
- Move Up changes the order of the selected attachment entries. This has not impact on the request
- Move Down changes the order of the selected attachment entries. This has not impact on the request
- Load from disc opens a file open dialog where you can select the file to attach. Select and confirm will load the file contents and insert them to the attachment entry, It will try to recognizes the appropriate MIME type.
- Edit MIME type lets you set your own MIME type that is uses in the request
Create a new attachment
Click with your mouse on the button Create new attachment. This will open a new dialog.
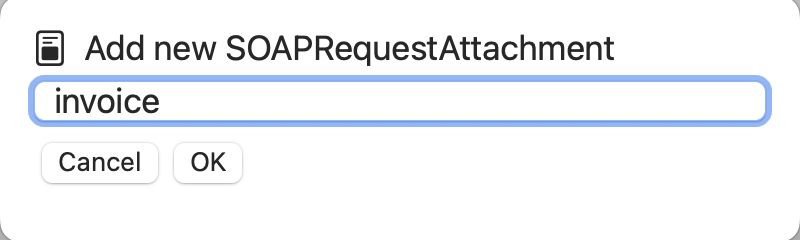
Enter the name (e.g. invoice) and confirm with OK. This will create a new attachment as in the screenshot above.
Click with your mouse on the button Load from disc to insert the local file contents. In the screenshot this is an invoice that should be sent with request to test an upload functionality.
The content is - if supported - in the content preview
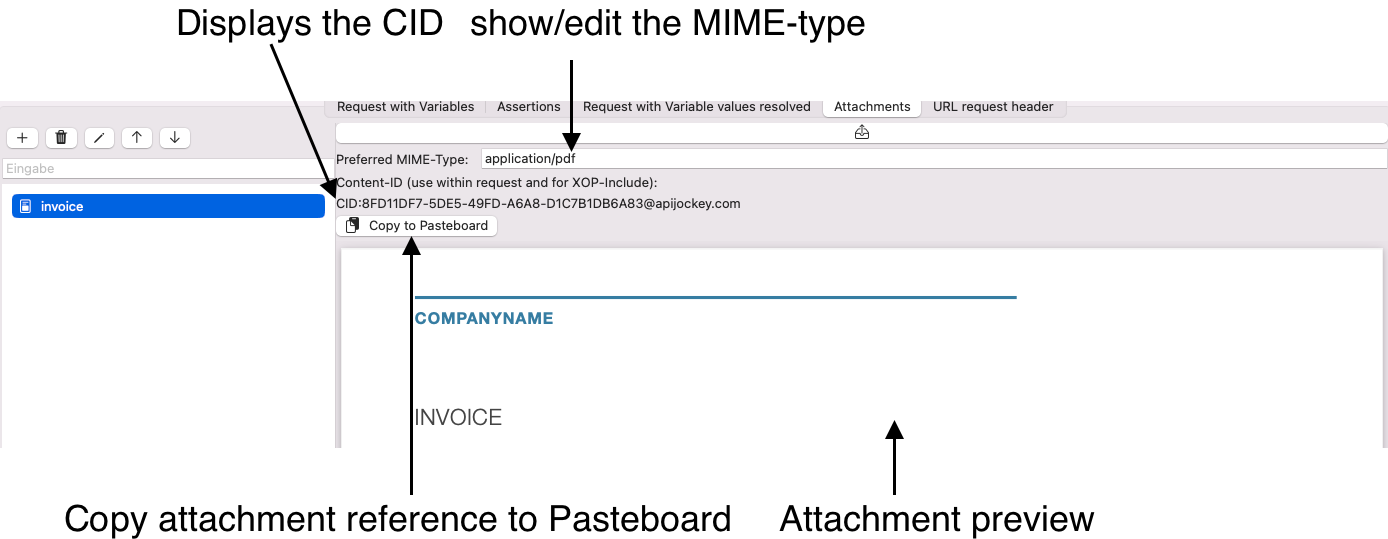
Supported Types
The builtin attachments preview supports:
- PDF-Documents
- Images
- Text
If the content type is different, no preview is shown, the attachment will still be sent with the request.
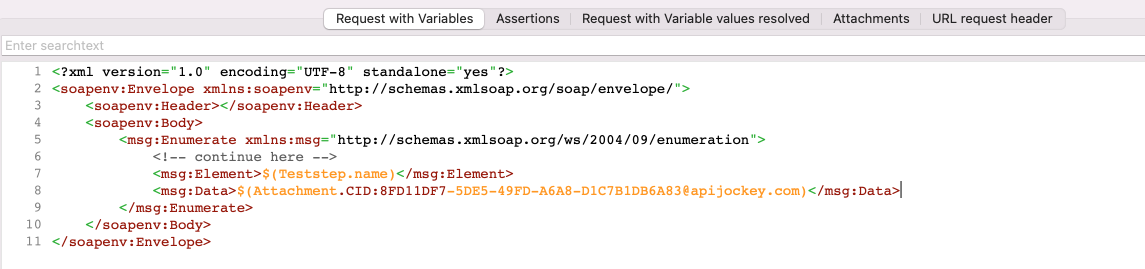
Reference attachments
If you want to reference the attachment in the request editor, click with your mouse on the button Copy to Pasteboard. The Pasteboard will contain a string like so:
$(Attachment.CID:8FD11DF7-5DE5-49FD-A6A8-D1C7B1DB6A83@apijockey.com).
You can copy this text in any element like in the screenshot for the element msg:Data