Create a Test definition hierarchy
When you work with a large number of webservices, with various releases, you will find it necessary to organize your tests in a structured, hierarchical way. API-Jockey organizes tests in a hierarchy of Repository lists, Testset lists, Testcase lists and Teststep lists.
Here, we will walk through the creation of such a Test definition hierarchy to get you started.
- A Repository, see
- A Testset
- A Testcase
These tree elements are mandatory for creating teststeps. APIJockey TEST provides several types of Teststeps. See more in View Teststep list
Create a Repository
When you launch APIJockey TEST you will see a number of views. We will walk through some of these views in this tutorial.
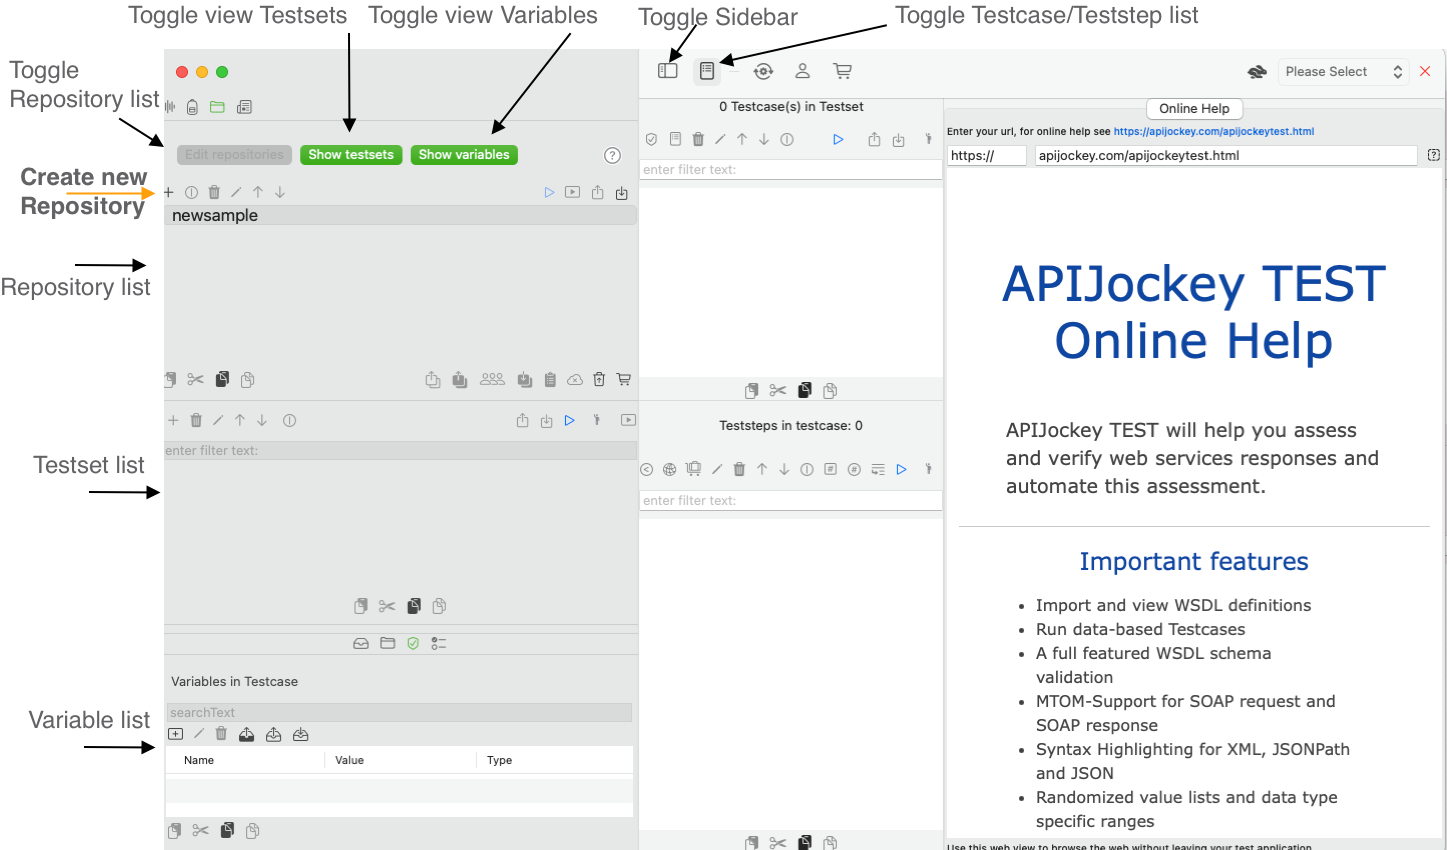
Click on the button Create new Repository to create a new Repository. This will open a dialog where you must enter the name of the new Repository. We enter the name Enumerations

Enter a unique name for the Test Repository. We'll call it Enumerations.
Confirm with OK. You can rename the repository at any later point in time. You will get the following view:
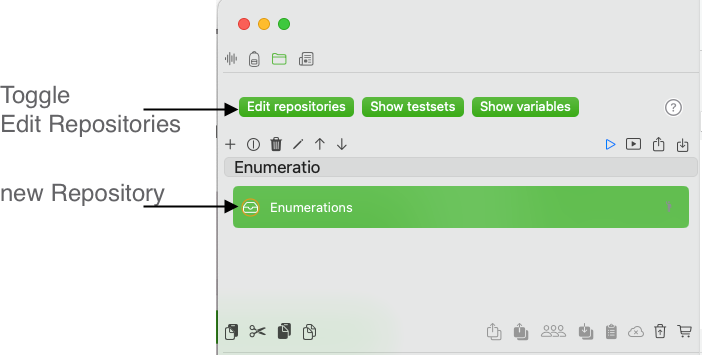
As you can see the toggle Edit repositories has become available, since there is a repository selected. You use this option, when you need to work on your Repository list.
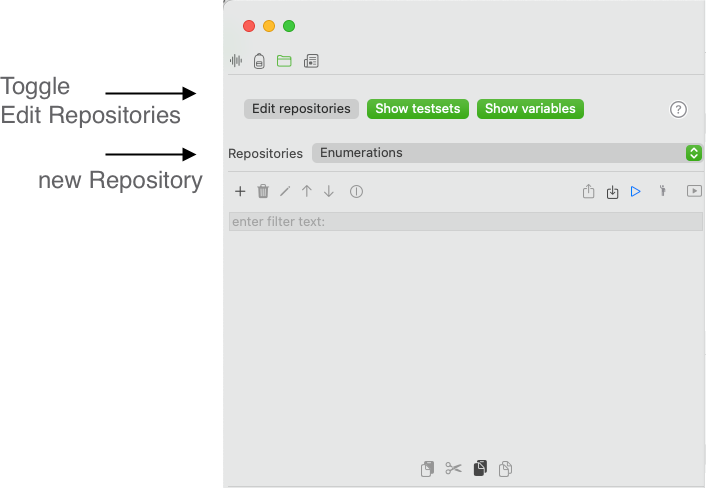
Untoggle the option Edit repositories, this will disclose the repository list. You can switch between the repository be selection one of them from dropdown list:
Create Testset
You are ready to create your first Testset. click with your mouse on the Button new Testset.
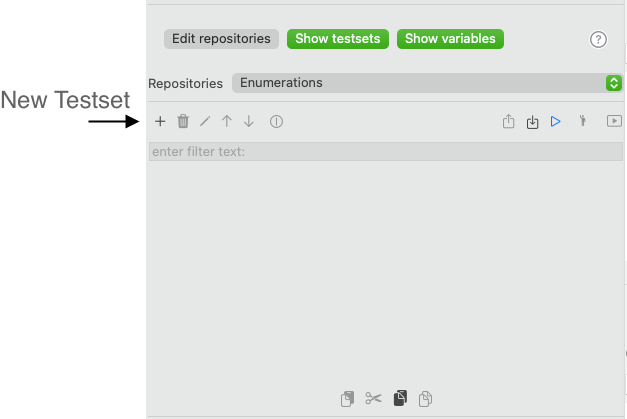
This opens a new dialog, enter folder as the testset name
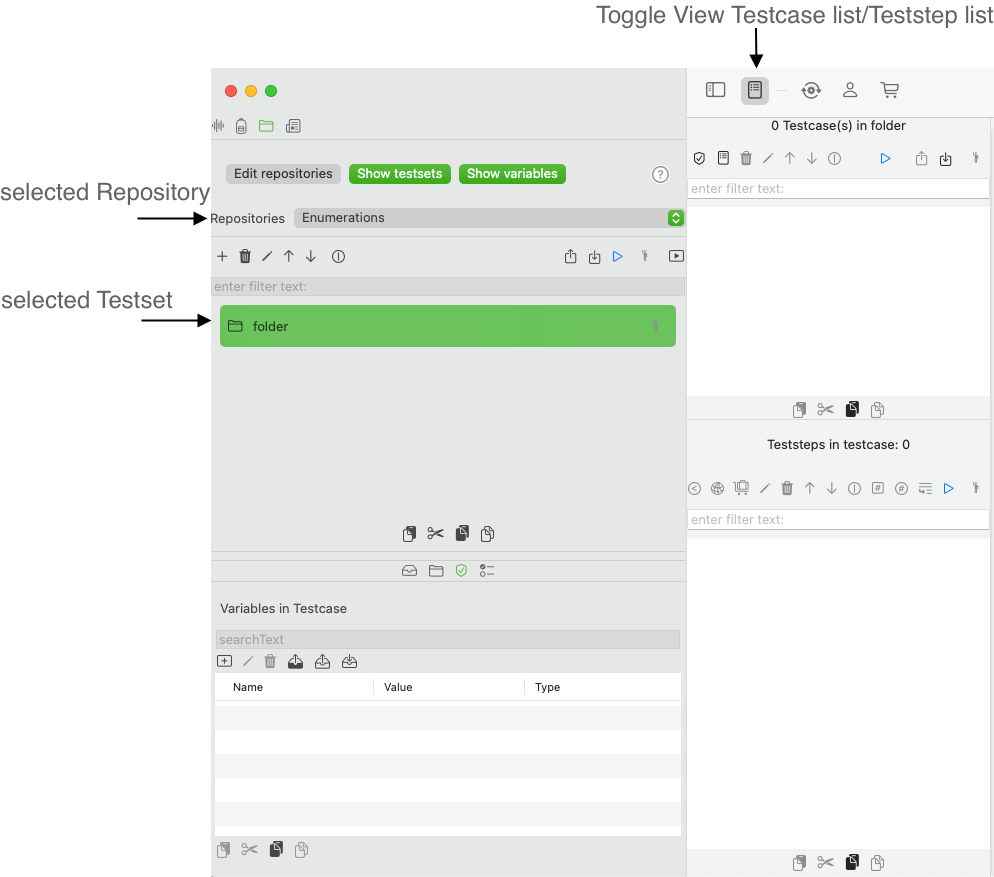
.Select the new testset and make sure, the Testcase/Teststep list is visible.
The testcase view shows the testcases associated with the currently selected testset, which is an empty list for now.
Create Testcase
To create a new Testcase click the + (new Testcase)
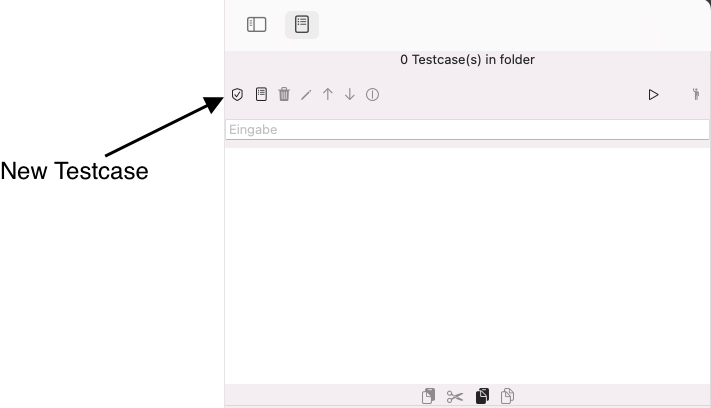
Drag the lower right edge of the dialog more to the right to get more space for the name. Enter the name Sample Testcase.
Confirm with OK.

Now, you have a completed Testdefinition hierarchy and can start creating teststeps.
You may continue reading with: